Setting up a mailjet account to send emails from Opticabase.
- Go to uk.mailjet.com and sign up for a free account.
- Choose MARKETEER when asked if Marketeer/Developer
- Once you have an account, log in and click on the small arrow in the top right corner and then click on “Account Settings”.

- Click on “Add A Sender Domain or Address”

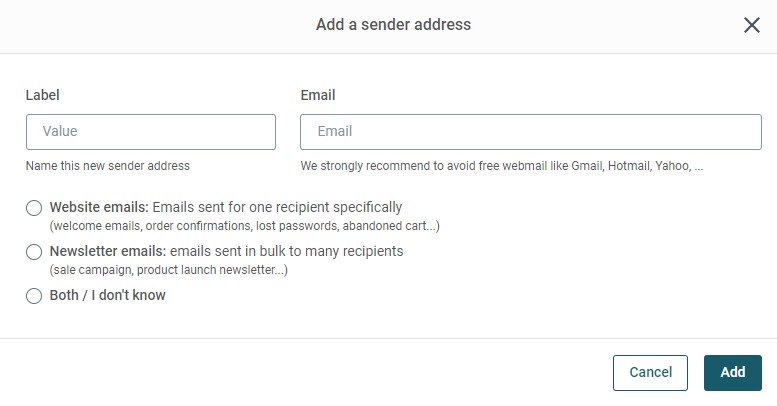
- Scroll down and click on “Add a sender address”
- Enter a name for the address next to label (for example, the name of your practice)
- Enter the email address that you wish your emails to come from when emailing from Opticabase.
- Choose “Both/I don’t know
- Click “Add”
- You will then receive an email from Mailjet (check your spam box) and you need to click on the link in it to activate the email address.
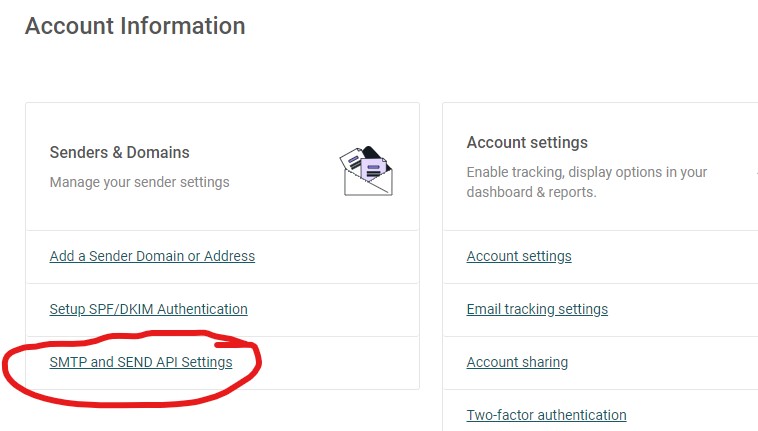
- Next, click on the small arrow in the top right corner and then click on “Account Settings” as you did earlier.
- Then click on SMTP and SEND API Settings.
- You need to then create a “secret key”
- Next you need to copy and paste your API KEY into the username box in Opticabase (see below) and SECRET KEY into the password box in Opticabase (see below). – In Lists, Email Settings.
- Use ctrl+v to paste them into Opticabase in Lists/Email Settings.
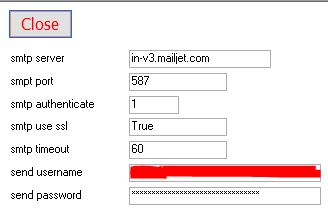
Email Settings in Opticabase - Make sure the other boxes on the Email settings screen are the same as the image above.
- Go into Practice Details and make sure that you have your email address in the practice email address box.
- You should now be able to send emails direct from Opticabase.
- If you are emailing receipts and reports, you will need to create a folder called “Reports” (without the quotes) in the C:\Opticabase folder of each computer that you wish to send them from.
Simply put:
You need the email address that you want patients to see the emails coming from in both Mailjet (as Active) and Lists–> Practice Details.
- To Email spectacle dispenses you need the email address of the lab on the “Lists –> Labs” screen
- To Email Contact Lens dispenses you need the account number and email address of the CL supplier on the “Main Menu –>Suppliers” screen